I tried making my first kimchi last week. Feeling encouraged by the good result, I made another batch a few days ago - actually this time for my MIL because she LOVES kimchi. Now that I know how to make kimchi myself, I don't have to buy it anymore from the local Asian grocery store - all thanks to Maangchi! I think her site is always the first place I visit everytime I want to cook something Korean. It's extremely hard finding Korean food here, I know 2 Korean restaurants around and the foods there are very expensive (well, they've got no competition...!) and the quality is not always the best. So, her recipes and especially videos are very helpful.


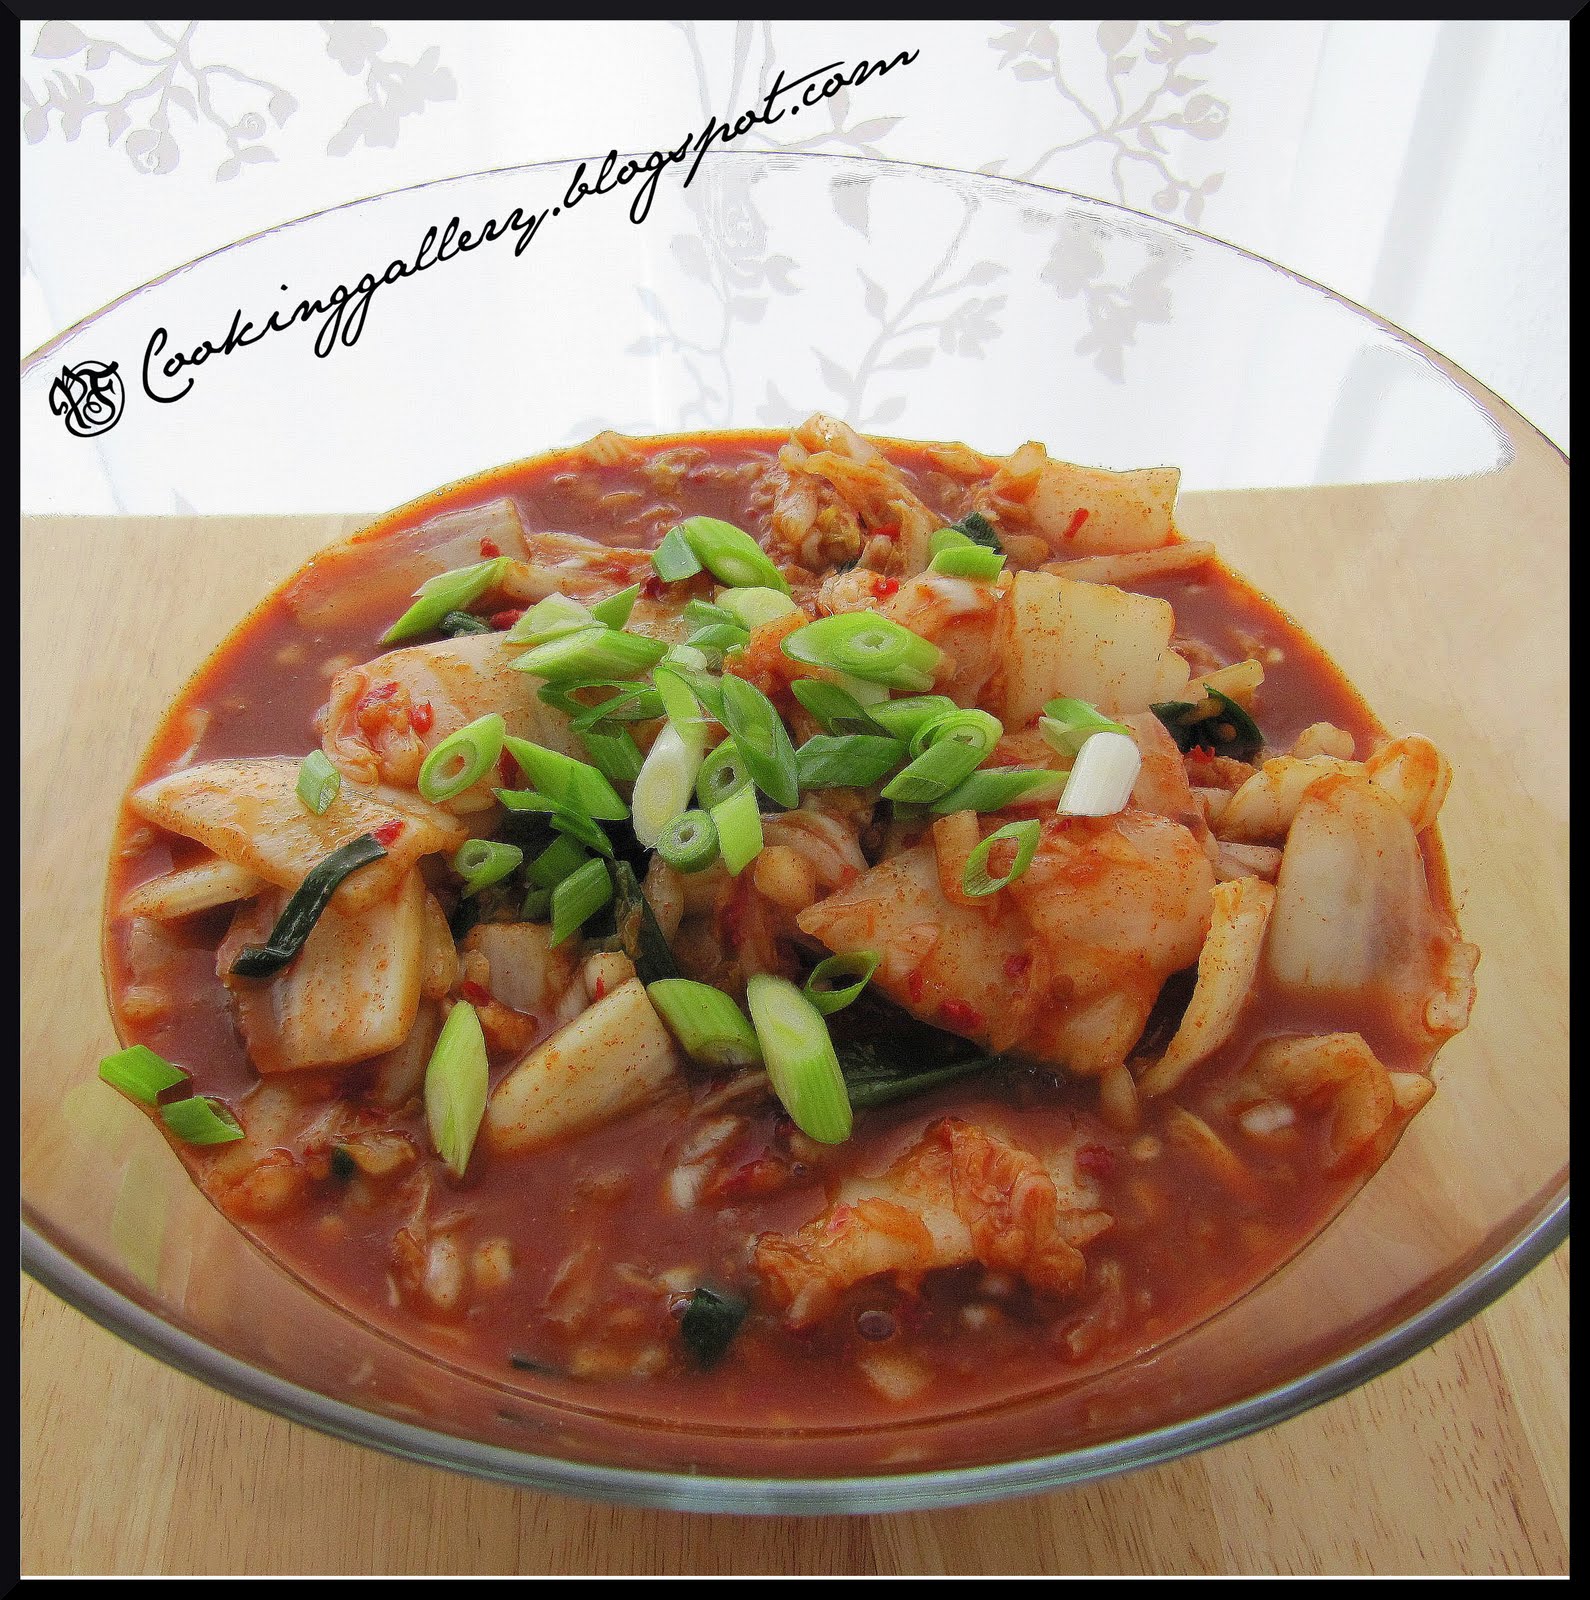
Ingredients
(Original recipe can be found here.)
  • 2 Napa cabbages, cut into bite size pieces
  • App. 1 cup salt
  • 1/2 cup glutinous rice flour (if you don't have this, change with tapioca flour or normal all purpose-flour)
  • 3 cups water
  • 1/4 cup sugar
  • 4-6 cups hot pepper flakes
  • 1 cup fish sauce
  • 1 cup minced garlic
  • 1 tbs minced ginger
  • 1 onion, minced
  • 2 tbs sambal oelek (optional)
  • 1 cup green onions, cut into 7 cm pieces
  • 1 cup carrots, julienned
What to do
  • Soak the cabbage pieces in water, drain and transfer them to a big bowl.
  • Sprinkle the cabbage with salt. Make sure all sides are salted.
  • Turn over the cabbage pieces every 30 minutes. This process takes 1.5 hours.
  • After 1.5 hours, rinse the cabbage in water - make sure you get rid of the salt covering the cabbage. Drain and set aside.
  • Kimchi paste: combine the glutinous rice flour and water together and mix it well. Cook this mixture under medium heat. You have to keep stirring (very important) until it gets thick and somehow sticky and translucent like glue.
  • Transfer this mixture into a bowl.
  • Add sugar and mix well.
  • Add fish sauce, hot pepper flakes, minced garlic, ginger and onion.
  • Add sambal oelek, green onions and carrots. Mix everything well. Keep tasting the paste, and adjust to your liking.
  • The last thing to do is to add the cabbage pieces into the kimchi paste.
  • Mix, mix, mix...and your kimchi is ready! Keep it in an airtight container and save it in the fridge until you want to savour it another time...:)!
Video from Maangchi. Watch and you're one step nearer to making kimchi yourself at home...!


I think one thing that you have to take care of the most is to make sure that the flour+water mixture has a porridge consistency after you cook it, if not, the kimchi sauce is going to taste horrible. I saw several comments in Maangchi's website asking why their kimchi turned out too salty or too hot - I think this might be because they didn't rinse the salted cabbage before they dumped it into the kimchi paste. I think it's also important to check out the taste of the kimchi paste yourself and adjust it to your liking. If it's too salty, add a bit of water. If it's too hot, add a bit of sugar, etc. It's as simple as it is.


Bookmark and Share
Remember the Sanrio-themed cookies I made some time ago? I had extra cookie dough at that time and so I decided to add some choc-chips into the dough. Well, so this was the result... Chocolate chip cookie bars. I guess I made these bars to compensate the failure I had in trying to make some Dark-Chocolate Blondie Bars...;)


Ingredients

  • 200 g sugar
  • 200 g butter
  • 400 g flour
  • 1 egg
  • 1 tbs Vanilla essence
  • Choc-chips
What to do
  • Beat butter, sugar, vanilla and egg together.
  • Sift the flour and continue to stir the dough until mixed well.
  • Add loads of chocolate chips.
  • Spread the dough in a baking tray.
  • Bake for approximately 25-30 minutes.
  • Cool and cut.


The choc-chip bars fresh from the oven.


Cut into bars.


And serve...!

Bookmark and Share


This salad is very easy to make because you don't have to do much cooking at all. The only thing you have to prepare is the breaded baked chicken (preparation time just around 5 minutes - and I got the idea from here) and the sunny-side up fried egg.

Ingredients - serves 1

Tomato-Mozzarella Salad

  • 1 tomato, sliced thinly
  • 125 g Mozzarella cheese, sliced
  • Lettuce
  • 2 tbs olive oil + 1 tbs dried basil (if you have fresh basil, it's even better)
  • 1 sunny-side-up fried egg
  • A dash of black pepper
What to do
  • Arrange the tomato and Mozzarella slices nicely. Drizzle with olive oil+dried basil.
  • Add lettuce, fried egg and sprinkle a dash of black pepper.
Breaded Baked Chicken
  • 200 g chicken breast
  • 2 tbs mayonnaise
  • 1.5 tbs Dijon mustard
  • 1 tbs Worcestershire sauce
  • A dash of sugar and pepper
  • Breadcrumbs
What to do:
  • Mix mayonnaise, mustard, Worcestershire sauce, sugar and pepper together.
  • Dip the chicken breast in the mayonnaise mixture, turning to coat.
  • Coat the chicken breast with breadcrumbs.
  • Bake chicken for 20-25 minutes.


Bookmark and Share


Indomie Mi Goreng is a one of my favourite instant noodles. Certainly not the healthiest food in the world, but it's really like a comfort food for me. It's easy to make and tastes delicious too, unfortunately it's full of MSG and the calories are rather high - about 390 per package! (considering that you wouldn't (at least I wouldn't) get really full just eating one package).


I normally eat my Mi Goreng plain, but some good additions are fried shallots, chili sauce, your favourite vegetables if you wish, and fried egg. Of course you can also add other things as well, like meat, seafood, other condiments or even rice! I think everyone has his/her own was of eating Indomie ;).


Bookmark and Share
Dan Dan Mian is a classic Szechuan dish with spicy, slightly sweet and sour meat sauce and (usually) wheat-based noodles. The sauce is very aromatic because of the use of ground Szechuan peppercorns, toasted sesame seeds and flavoursome Szechuan hot bean-sauce.


I was inspired to make this dish after I browsed my Chinese Rice and Noodles cookbook from Wei-Chuan cooking school, which is full of beautiful and tasty pictures and easy-to-follow recipes. But I of course added more ingredients here and there, it's just not me if I didn't do so ;).


I ground some toasted sesame seeds to give the noodles some nutty flavour. Some people even use peanut butter. I didn't have chili oil available, so I made my own chili paste by mixing some sesame oil with paprika powder.

Dan Dan Mian

Serves 2

400 g Udon

460

200 g ground pork

411

70 g mushrooms (optional)

15

1 tbs sesame oil

105?

1 clove garlic, minced

4

1 tbs ground ginger

19

2 tbs Szechuan hot bean-sauce (or to taste)

50?

1 tsp paprika powder (mixed with 2 tbs sesame oil)

230?

2 tbs soy sauce

20

2 tbs Shao Xing wine

25 ?

1 tbs Chinkiang vinegar

?

½ tbs sugar

16

1 tsp Szechuan peppercorns (toasted & ground)

?

1 tsp sesame seeds (toasted & ground)

51

50 g cucumber, julienned

8

½ cup green onions, julienned

14

TOTAL

1428 calories


714 calories per serving


What to do:
  • Heat 1 tbs oil in a wok over medium heat. When the oil is hot, add garlic, ginger, ground Szechuan peppercorns and ground sesame seeds. Sauté until fragrant.
  • Add the pork and mushrooms. Cook and stir until the pork is slightly brown.
  • Add Shao Xing wine, paprika+sesame oil mixture, Szechuan hot bean sauce, Chinkiang vinegar, soy sauce and sugar. Simmer for 3 minutes. set aside.
  • Place the (cooked) udon noodles in a bowl and pour some of the meat sauce onto them.
  • Garnish with sliced cucumbers, green onions and chopped chili peppers.


Mix everything together! Add chili oil to your noodles if you want, or even toasted peanuts. The Dan Dan Mian tasted fabulous! Give it a try!

By the way, if you've read my previous post, you know that I was a contestant for Battle Sandwich hosted by DoggyBloggy. Unfortunately I didn't win, I guess this time the God of Luck simply didn't shine upon me ;)! However, I would like to thank all my dear readers who have supported me with their kind comments! If you want, you can check out all the creative creations from the other contestants here.


Bookmark and Share
Look at this menu! Why on earth did I make giant prawn tempura with bacon, tamagoyaki (Japanese omelet), spiced rice, cheese, etc to fill a wrap?


Well, maybe this kind of sandwich wrap is nothing extraordinary for some of you, but for me it is. It's something special. I would never have made such a festive wrap just for lunch. So what's the big fuss then?? Well... it's because I am now one of those BATTLE SANDWICH contestants hosted by DoggyBloggy from ChezWhat? (I feel as if that I am in Iron Chef now ;)). The theme of the 'battle' is Sandwich - which means that you have to create a unique kind of sandwich. I thought about making sushi sandwich with rice (Well..., it's the sushi fanatic in me !;)), but Doggybloggy told me that it had to be something with bread/dough. I am absolutely not a sandwich person - don't get me wrong, I like eating sandwiches, but only when other people make them for me...! How many times have I made a sandwich myself in my life? 5 times? 6 times? So the battle's theme is actually really something quite challenging for me. However, I decided to participate in this 'Culinary Smackdown' because I wanted the challenge, I wanted to create and make something different. The last two years I had been so boring and even unproductive in the kitchen - even my husband has complained about it. I had mostly been making the same things over and over again: pasta, soup, rice, delivery service, noodles pasta, soup, delivery service ;)! Well, still better than my husband's Uncle Ben's instant curry right from the glass ;).


SO! This is a competition, but I didn't want to focus too much on creating something fancy. Indeed I wanted to create something unusual, but the sandwich had to include things I like. I didn't get too further away from my original idea of sushi sandwich - my favourite filling for a sushi roll is prawn tempura, so I decided to use prawn tempura for my wrap - but the giant ones :). Well, 'giant' is probably quite exaggerating, they're actually not really big, but long. I used bamboo skewers to make these 'giant' prawn tempura.


Let's look at the ingredients for the wrap filling in the detail
  • Giant prawn tempura
  • Spicy rice (with chopped onions, chicken stock, parmesan, a bit of Kimchi juice and green onions)
  • Cheese
  • Red Onion
  • Tamagoyaki (Japanese omelet) with bacon
  • Bacon
  • Lettuce
  • Chili peppers
  • Spicy avocado yohurt dressing


I love this spicy yoghurt dressing! And I happen to like the picture above too! I don't usually make very good photos...:)


Recipe for this fabulous and super easy-to-make dressing :)!

Spicy Avocado-Yoghurt Dressing
  • 250 g yoghurt
  • 2 tbs Sriracha chili sauce
  • 1 tbs garlic sauce
  • 1 tbs dried majoram
  • 1/2 tbs Maggi/Knorr chicken bouillon granules
  • 1/2 tbs sugar
  • 1/2 avocado, chopped
You can also add cocktail sauce to this dressing if you want, even sambal oelek, as it's going to add an extra spicy kick.


  1. First add the spiced rice to the tortilla, spread the dressing on top and add the chili peppers.
  2. Add cheese and red onion rings.
  3. Add slices of bacon and green onions.
  4. Add the bacon-omelet.
  5. Add lettuce and prawn tempura.
  6. Wrap it!


I wouldn't bother adding a calorie counter for this recipe. I don't even want to look at it! After eating this, I didn't eat for the rest for the day! Look at those bacon slices...!! So, DoggyBloggy, make sure that I win ;)!


Well, no, it's worth it, even if I didn't win, this competition has made me make something gorgeous-looking and drool-worthy....;D Hahaha...


Nom, nom, nom...!!!


Make sure that I win!!


You can even take a peek at my super-cute (and super-greedy!) bunny nomming watermelon ;)! He wants me to win too...!

Bookmark and Share


Another delicious recipe from Maangchi - Kimchi Pancakes or Kimchijeon in Korean ;). I had always wanted to try this recipe because I love Korean pancakes and I love kimchi, so nothing could go wrong, especially because Maangchi's videos are always so clear and easy-to-follow :).


This time I used my homemade kimchi (recipe can be found here) - my first time making kimchi, and I was amazed how easy it was actually making kimchi yourself at home!! I always hesitated making kimchi at home because I thought it would be too hard to make, but I was completely wrong. The process itself was very easy with 100% success rate if you follow the step-by-step instructions from Maangchi, you just have to be patient because there's a quite long waiting time - 4 hours in total to get your kimchi ready (but basically, you don't really have to do anything during these 4 hours, you just leave your kimchi alone and do your own things while waiting).

Now, let's watch the video below (from Maangchi) to see how to make kimchi pancakes :)! I made both types, Kimchijeon with chopped kimchi and Kimchijeon with whole kimchi leaves.


Here is my adapted recipe for Kimchijeon with chopped kimchi. I added some seafood too and oyster sauce instead of salt (I love my oyster sauce...!!)

Kimchijeon with Chopped Kimchi and Seafood

Serves 2 - 4

150 g flour

546

150 g water

0

150 g squid

139

50 g shrimps

45

100 g chopped kimchi

27

3 tbs kimchi juice

2?

½ tsp sugar

8

1 tbs oyster sauce

1

½ onion, chopped

25

2 tbs oil (for frying)

240

TOTAL

1033


517 per serving (for 2 people)


258 per serving (for 4 people)


Dipping sauce

  • 5 tbs soy sauce
  • 100 ml hot water
  • 1/2 tbs sugar
  • 1 tbs chopped onion
  • 1/2 tbs chopped green onions
  • 1 tsp chopped chili
  • 1 tbs sesame oil
  • roasted sesame seeds


And this is my adapted recipe for kimchijeon with whole kimchi leaves...I slightly like this version of kimchijeon better :).

Kimchijeon with Whole Kimchi Leaves

Serves 7

7 kimchi leaves (around 100 g)

27

150 g ground pork

308

125 g minced tofu

88

1 tbs oyster sauce

1

½ onion, chopped

25

1 egg

70

1 tbs chopped chives

1

1 tsp sesame oil

60?

Flour for coating the kimchi leaves

300??

TOTAL

1120 calories


160 calories per serving


Yummy...!


Bookmark and Share


This morning I finally received this lovely new 'baby' from Amazon - a takoyaki pan :)! Well, it's actually not a takoyaki pan, but a pan for making Danish Aebleskiver (some kind of Danish Poffertjes) or German Pförtchen, but it's the closest one to Takoyaki pan I could find here in Germany. Around two years ago I bought a Poffertjes pan with the hope that I would be able to make some takoyaki with it. Unfortunately the holes were not deep enough for making takoyaki (silly me didn't even really know what a poffertjes looked like...!), so even though the taste was fine, my takoyaki were all flat instead of round. However, from now on I wouldn't have such a problem anymore...:).


Takoyaki making - you can see I also used shrimps besides squid ( couldn't find octopus - well, maybe I should give Paul the Octopus a visit one day ;)!)

I used the recipe from the Cooking With Dog video which you can see below. I absolutely love Cooking With Dog channel, it's cute, the recipes are clear and the foods all look great...:)!


Bookmark and Share


Sanrio is a Japanese company that produces kawaii (cute) merchandises aimed for young girls. The most famous character from Sanrio is "Hello Kitty" - I am sure most of you have heard or seen "Hello Kitty" somewhere. Growing up, I loved buying and collecting Sanrio stationary products and accessories, from cute notebooks, stickers, pencil cases, rulers, letter-sets, well, you name it! I still love them, but there's not much choice around here in Germany, just Diddl, Nici and Hello Kitty in a few stores. I was never that fond of "Hello Kitty" anyway. I prefer other characters from Sanrio like "Badzt-Maru" the penguin, "Keroppi" the frog or "Monkichi" the monkey ;). I was inspired to make some cookies using these characters from Sanrio, even though I finally didn't make "Keroppi" because my green food colouring's gone! Anyway, here they are...


"Welcome to my house," said Jacque the bear. "You can also have some Badtz-Maru cookies with milk :)!"

Do you see the character sketches behind the cookies :)?

Which character do you like best?


Chococat the Cat?


Kuririn the Hamster?

Badtz-Maru the Penguin?


Or, Monkichi the Monkey?

I personally like "Kuririn" the Hamster the best, because the Kuririn cookies have the least flaws I think. Anyway, it was a quite fun project with a lot of drawing and painting :)! I used marshmallow fondant to decorate the cookies, click here if you want to see the recipe. I used food colourings to paint the characters and Food marker pens to outline them. I used some sugar sprinkles for the general decoration like the hearts, pink balls and pink glitters on Kuririn's head.


Sugar sprinkles I used.

I made the cookies using Peggy Porschen's recipe from her wonderful book: Simply Spectacular Cakes. Very simple and easy to remember: 200 g butter, 200 g sugar, 400 g flour and 1 egg. That's it!


Bookmark and Share
Next PostNewer Posts Previous PostOlder Posts Home